Texture Paint In Blender Using Ucupaint
by Garrett Mooney, Pixel-Nexus | 25 September 2024
Blender is an open source 3D graphics program that can be used for just about anything nowadays. 3D modeling, VFX, Animation and even Drawing. What you can do in Blender is only limited by your imagination. However, even though a lot is possible in Blender, not everything works as well or as you’re familiar with in other programs. Blender’s built-in texture painting options are a great example of something that is very nice to have in Blender, but not that nice to use.
Luckily for us, if there’s a problem with Blender, there’s probably someone annoyed enough to fix it with an add-on. And for one of our projects we wanted to give Ucupaint a try.
Ucupaint
This open source add-on created by Ucupumar adds some much needed features to texture painting in Blender. At first glance it seems as though it’s just adding a layer stack, a main feature in most painting and 3D texturing programs.
But looking a little closer I realized that it’s much better than just that. It’s as though they took the shader editor and put it into an easy to use UI. You can do so much without digging into the shader editor and worrying about spaghetti. If you do need to add anything on top of your ucupaint setup. You can! Ucupaint creates a custom node group that you can build off of if you do need to go into the shader editor.
Set-up
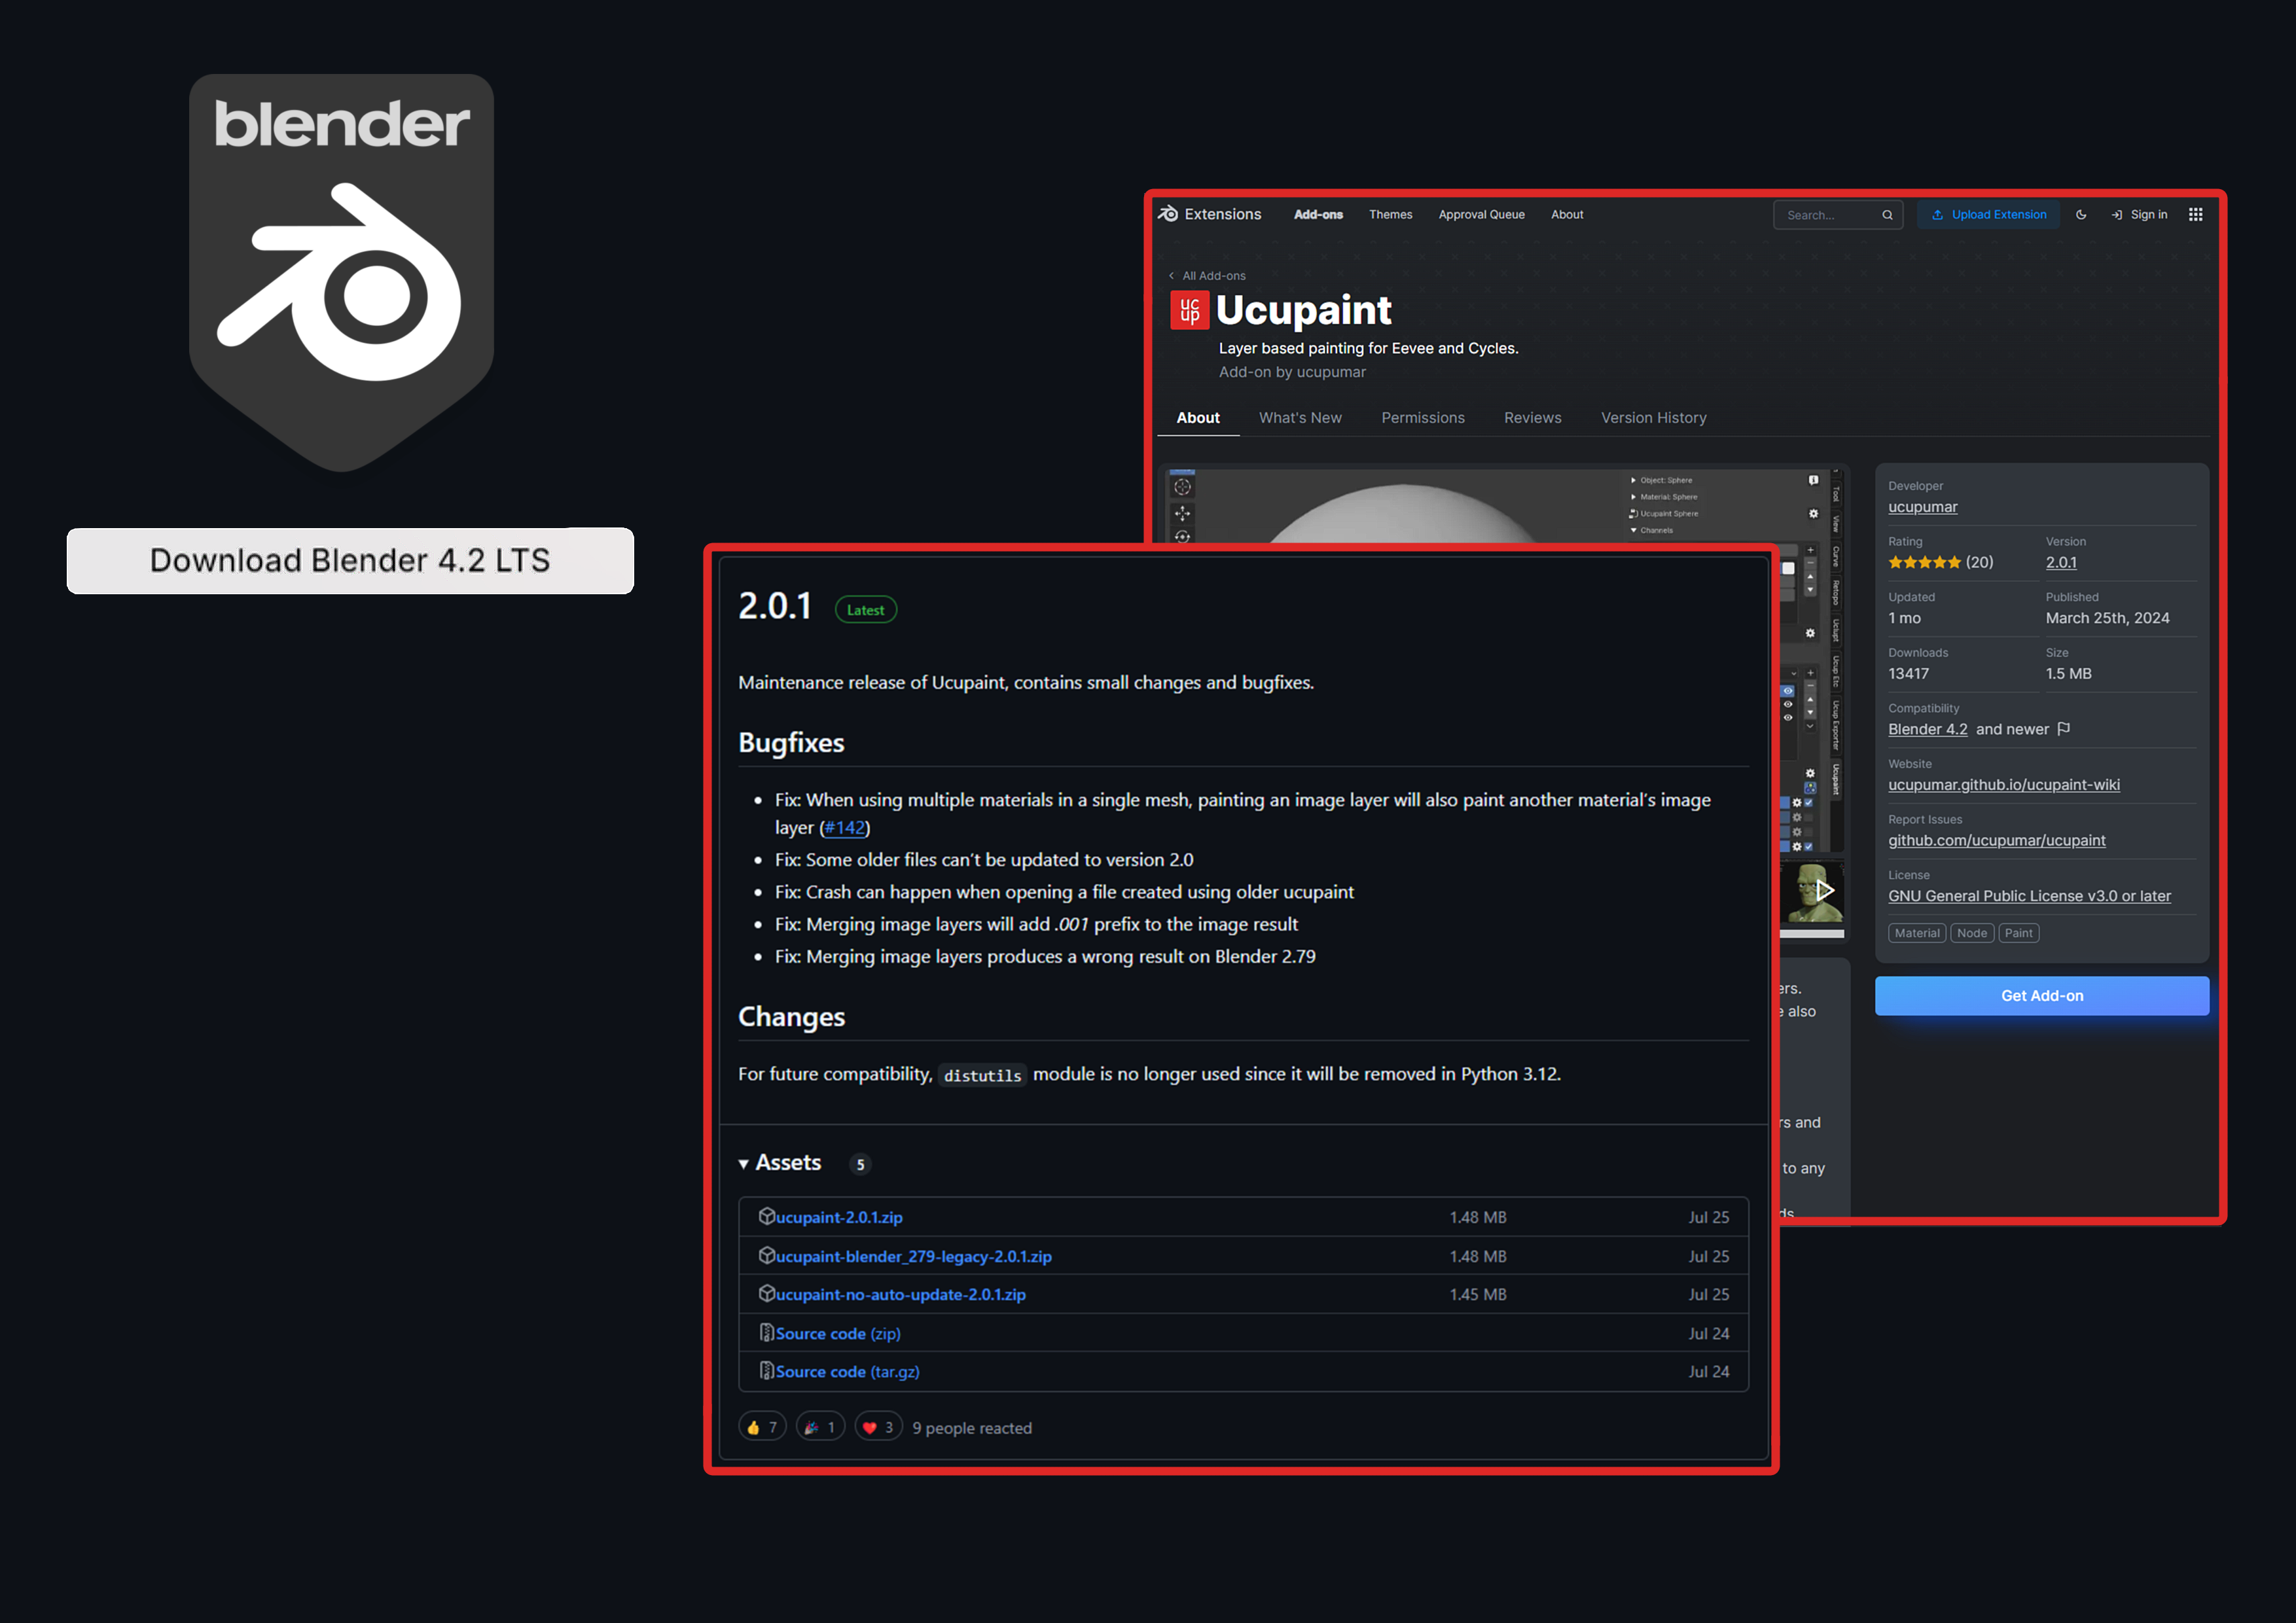
Let’s make sure we can have the add-on in Blender. We’re using Ucupaint 2.0.1 which is compatible with Blender 4.2 and higher. And there are two ways you can install Ucupaint.
Since March 2024 Ucupaint is available on the extensions site for Blender. You can install it to Blender by dragging and dropping it in. Ucupaint is also available on its Github page. You can download the zip file from its releases and load it into Blender, as you would any other add-on. Doing either of the two, you will now see the Ucupaint tab appear in the sidebar.
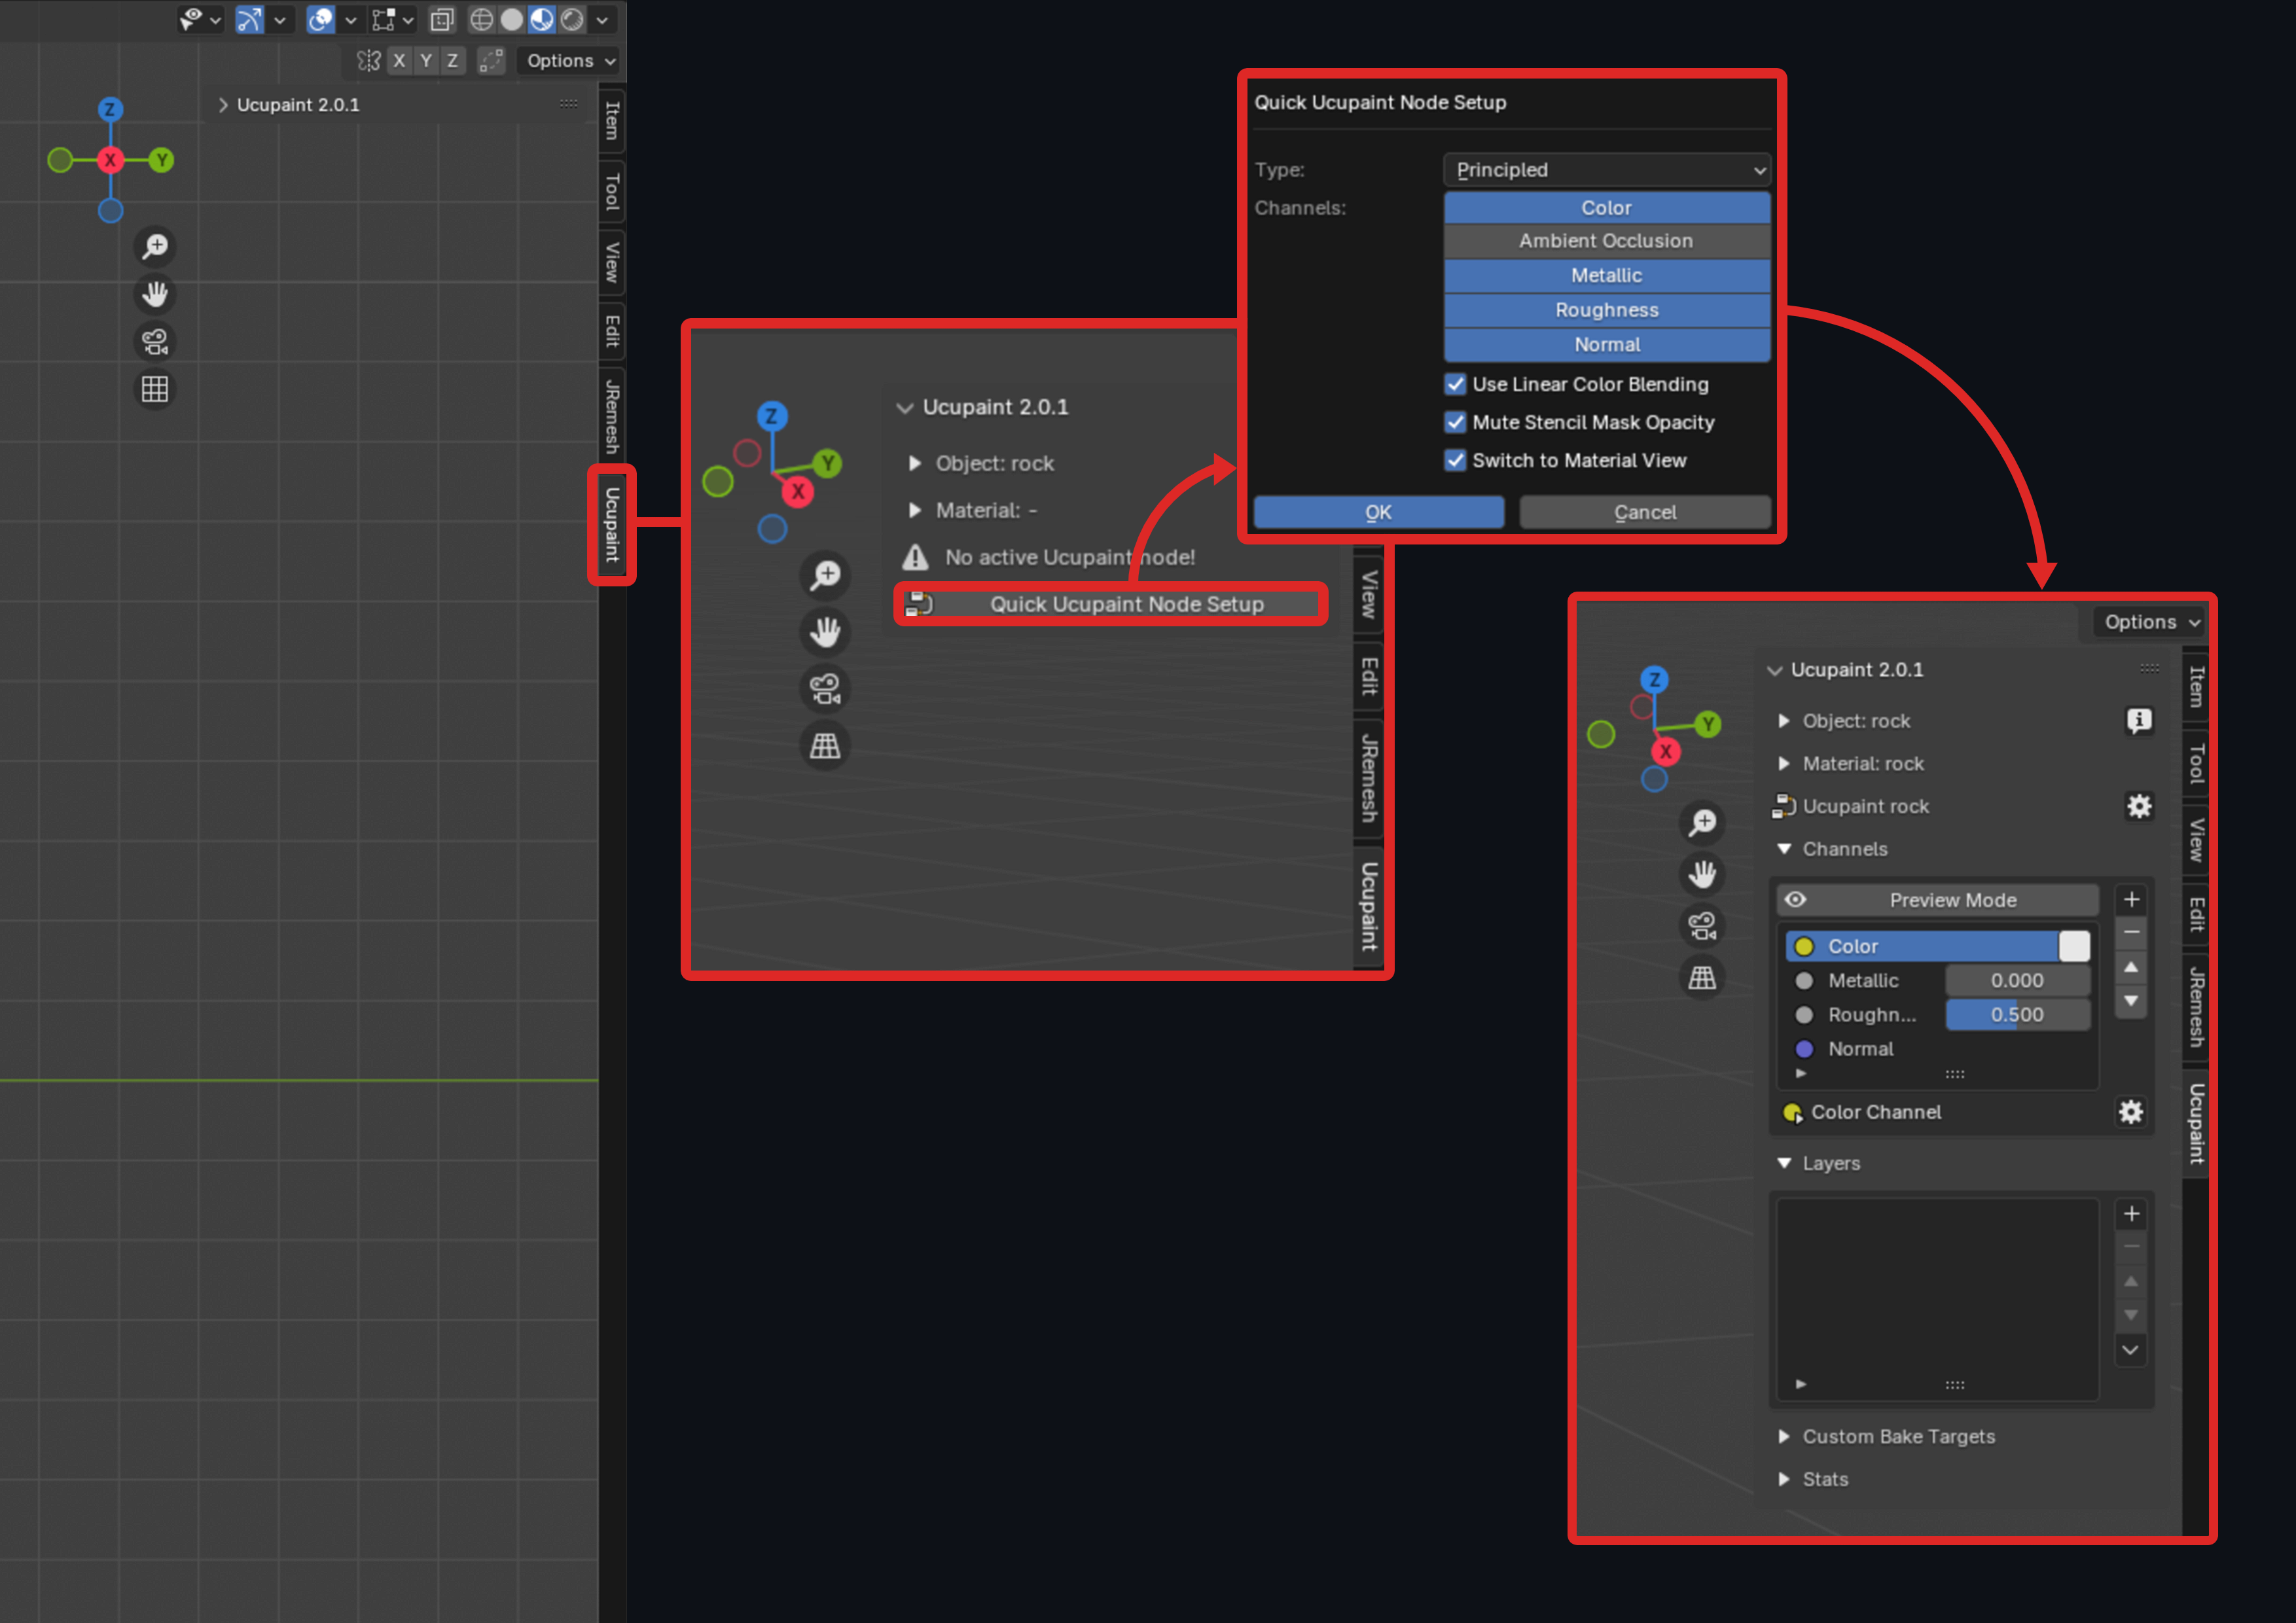
UI
You won’t see anything yet, to access Ucupaints features you must click the “Quick Ucupaint Node Set-up” and then you can choose the type of shader you want, hit okay and you now have Ucupaints main UI. You can see the channels the material is affecting and below that the layers panel where you will do most of the work.
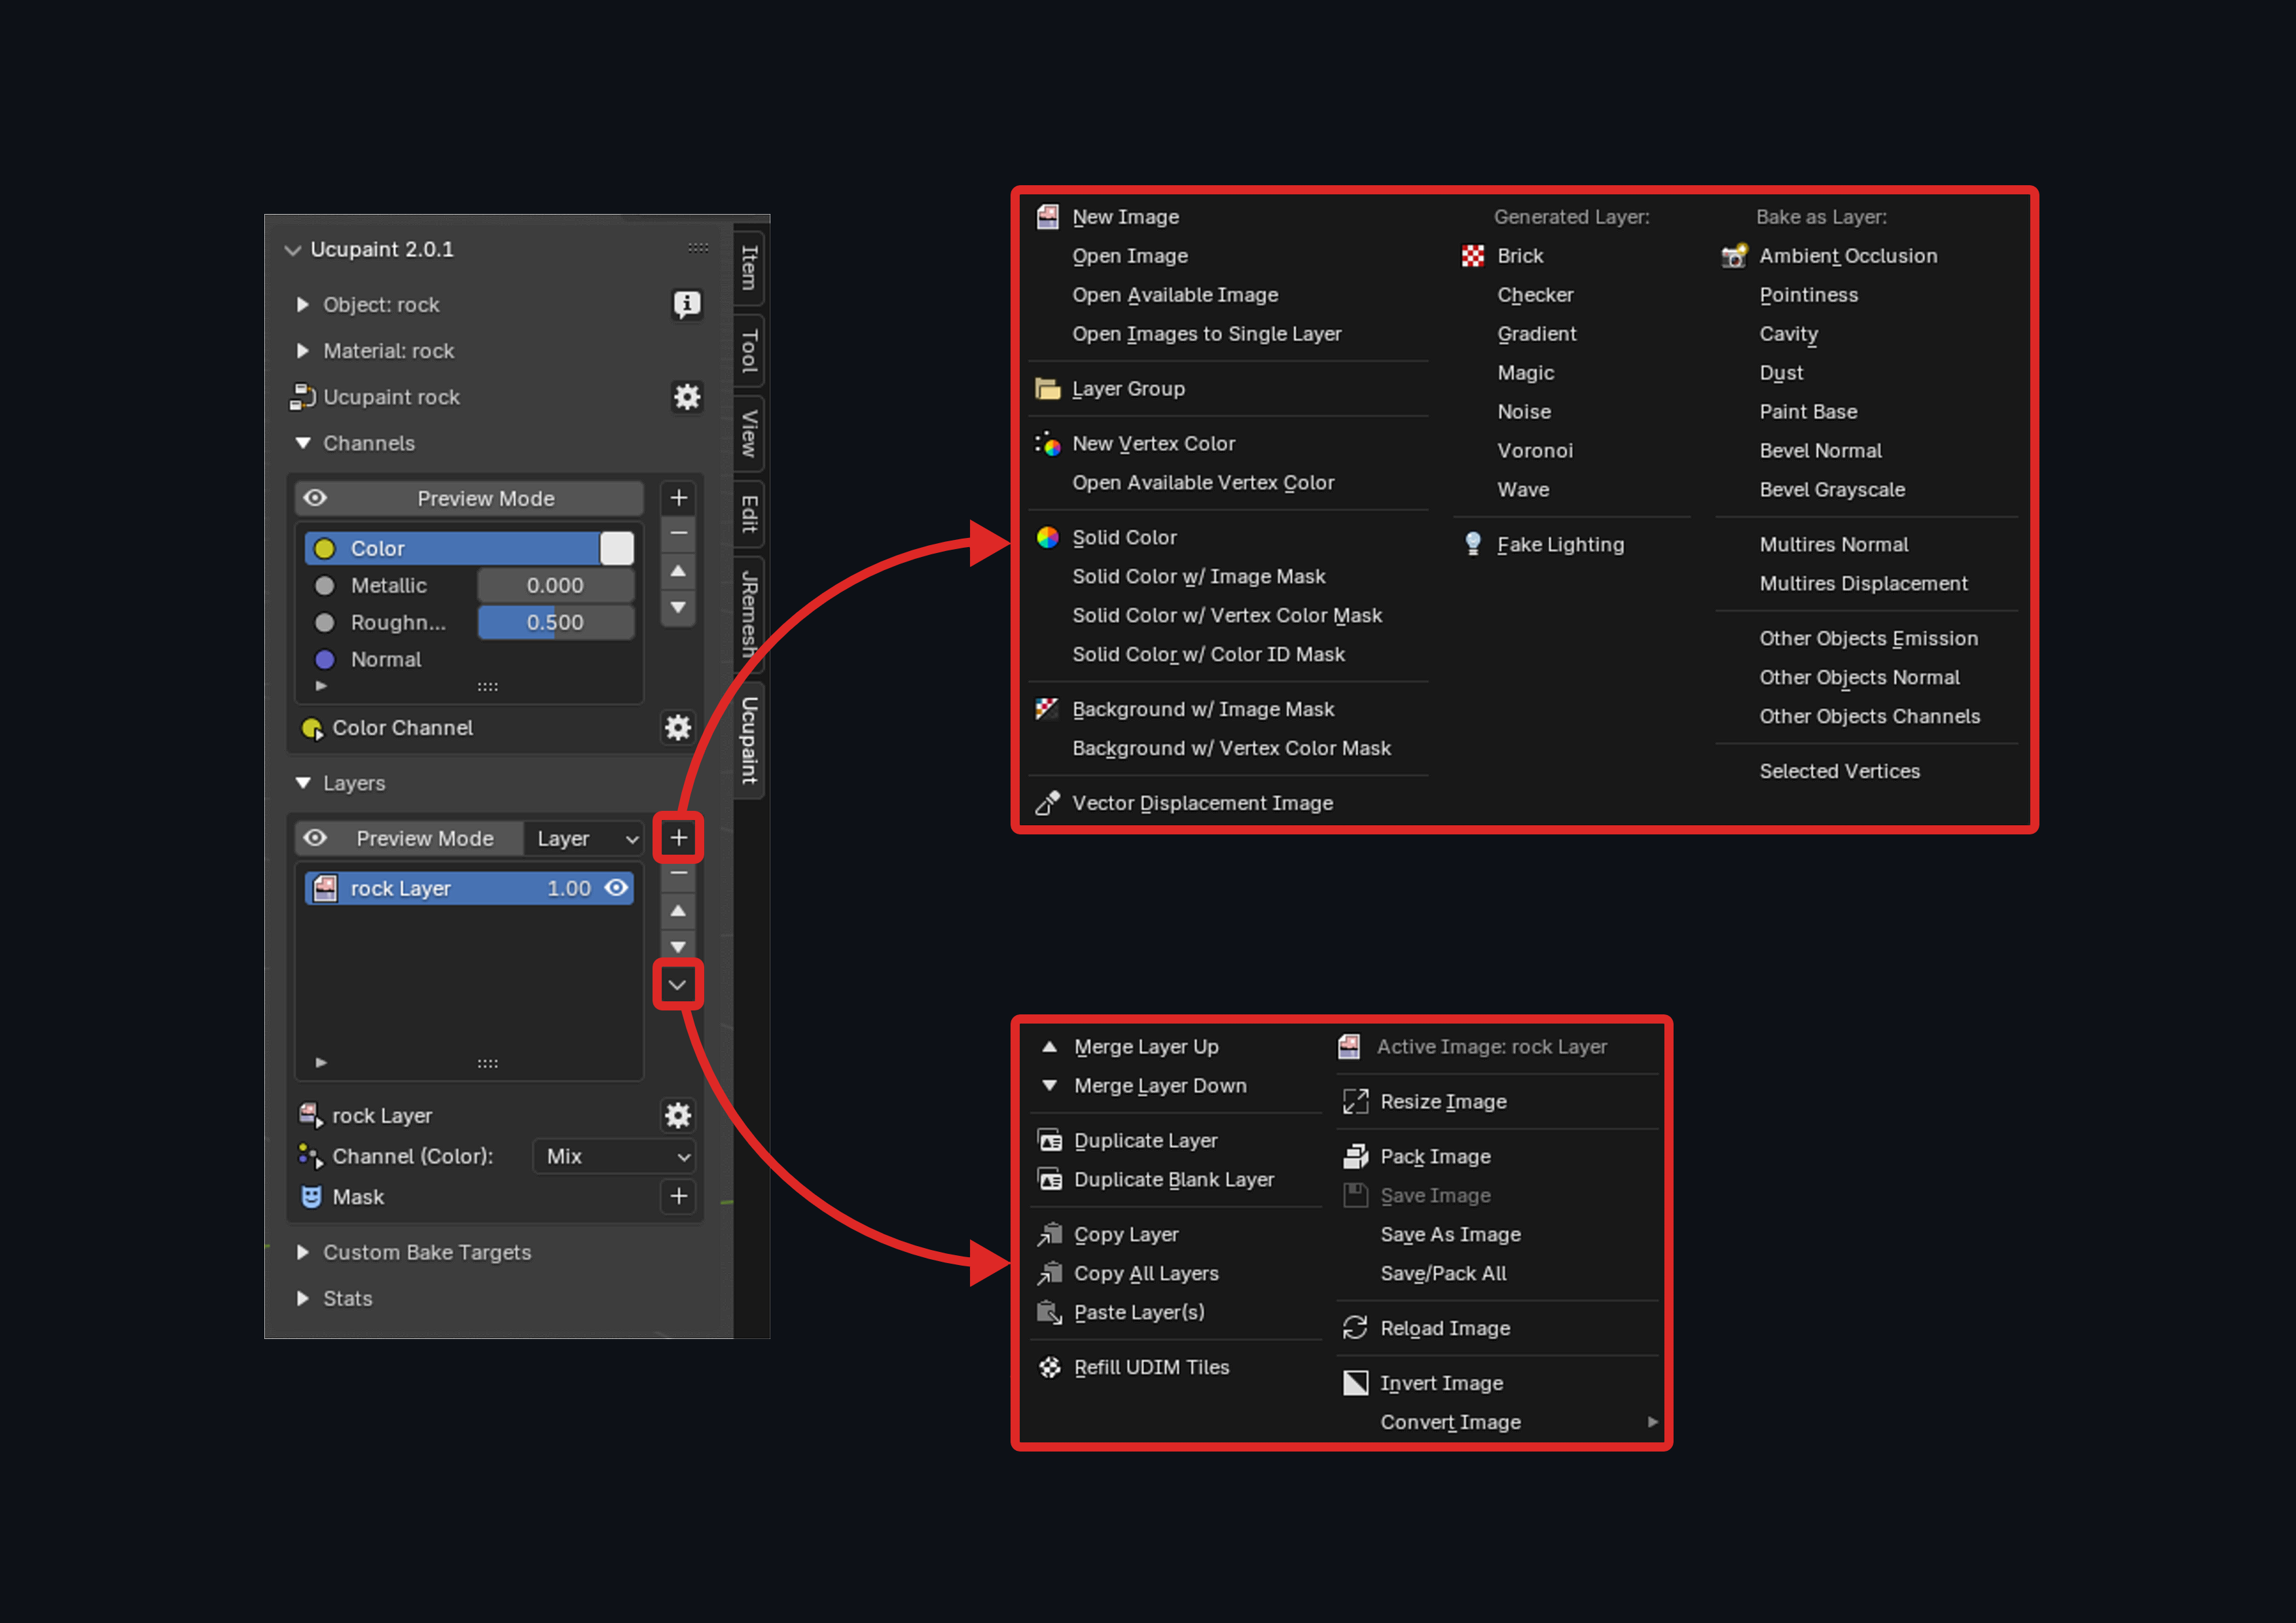
Layers
Ucupaints main addition is that it adds a layer stack with much of the layer functionality you’re probably familiar with from other 3D texturing programs. You can add, remove, merge, duplicate, group and arrange layers. All of those options can be found by poking around in the buttons next to the layers panel.
If you want to add a layer you have quite a few options to choose from. You can choose to create new image textures, add an existing one, add generated textures such as the Noise or Voronoi or you can add a baked layer as well, for example Ambient Occlusion. You can also change the Vector type of the texture, which is by default set to UVMap. The settings for the generated textures are also available in the UI.
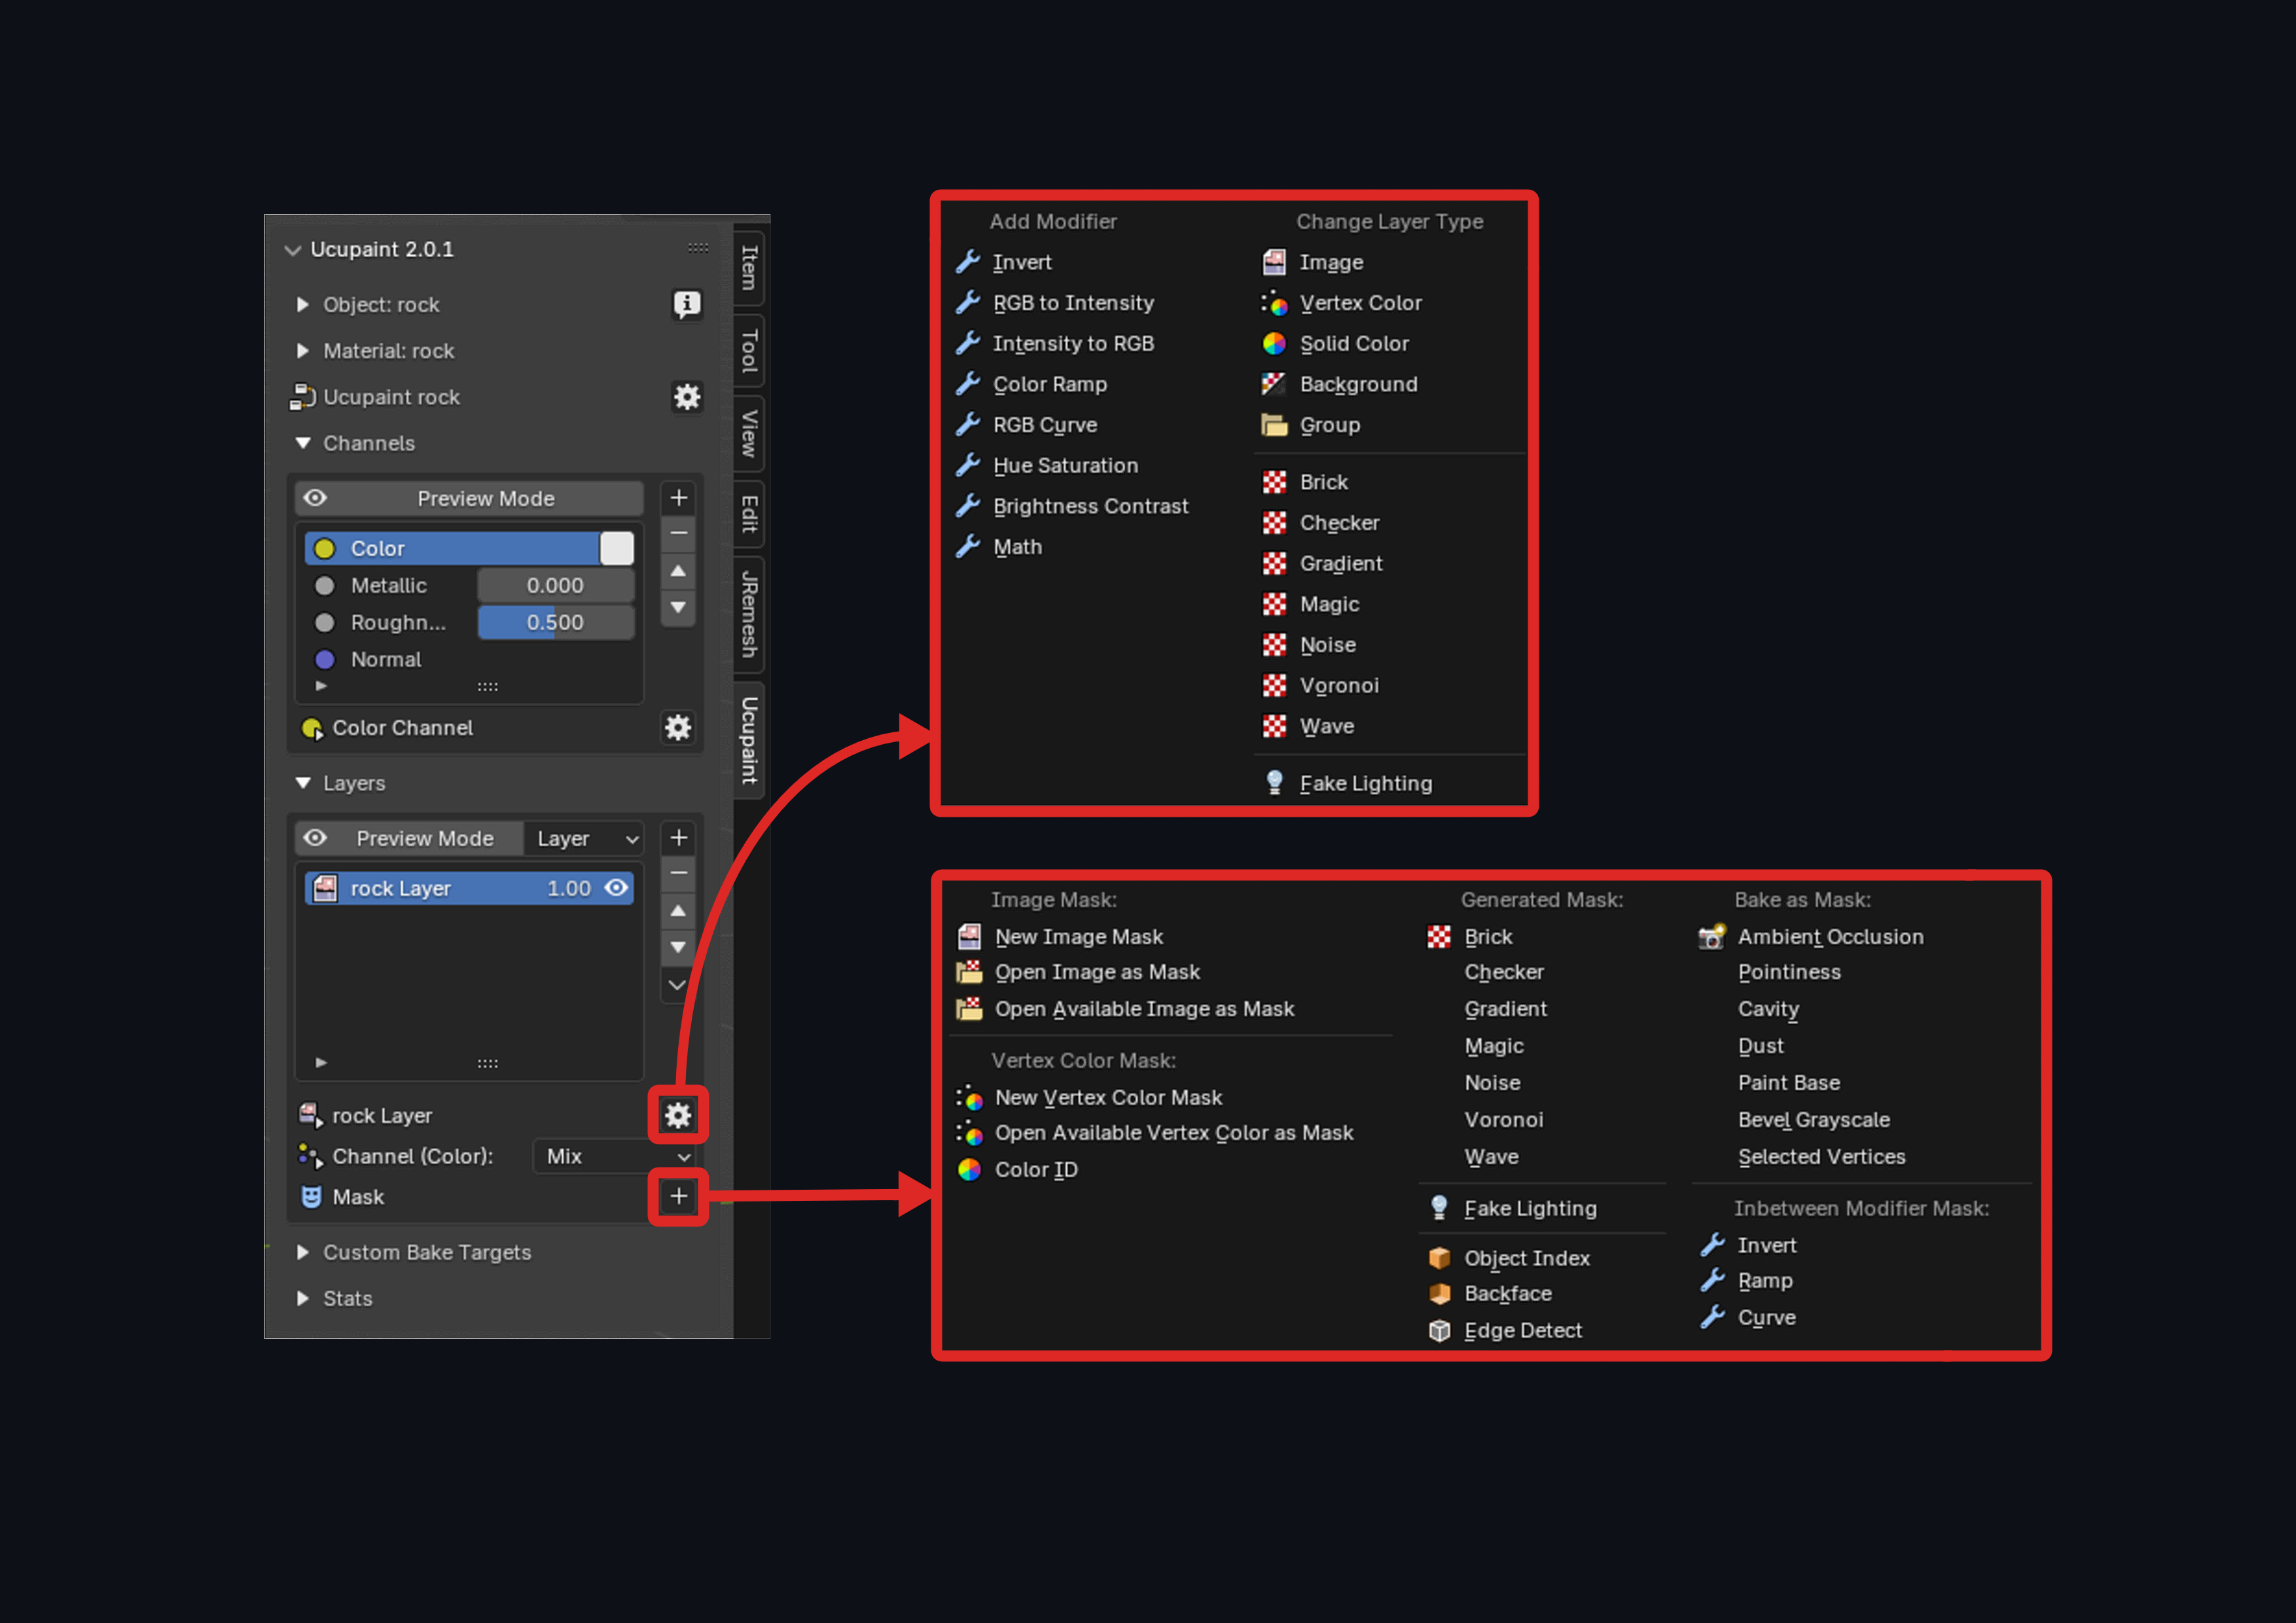
Masks
If you want the layer or group to only affect certain parts, you can choose to add a mask to it. There you also have most of the same options as you do with normal layers. You can add a custom image texture, a vertex color or color ID or a generated texture. This gives you the option to add complex layering to the material or even layer several materials.
Modifiers
Ucupaint gives you the option to add modifiers to your textures and masks. These modifiers are the same nodes you’ll find in the shader editor and have all of the same settings right there in the Ucupaint UI. For example you have the color ramp node that allows you to compress the values of a texture or even assign it a color gradient.
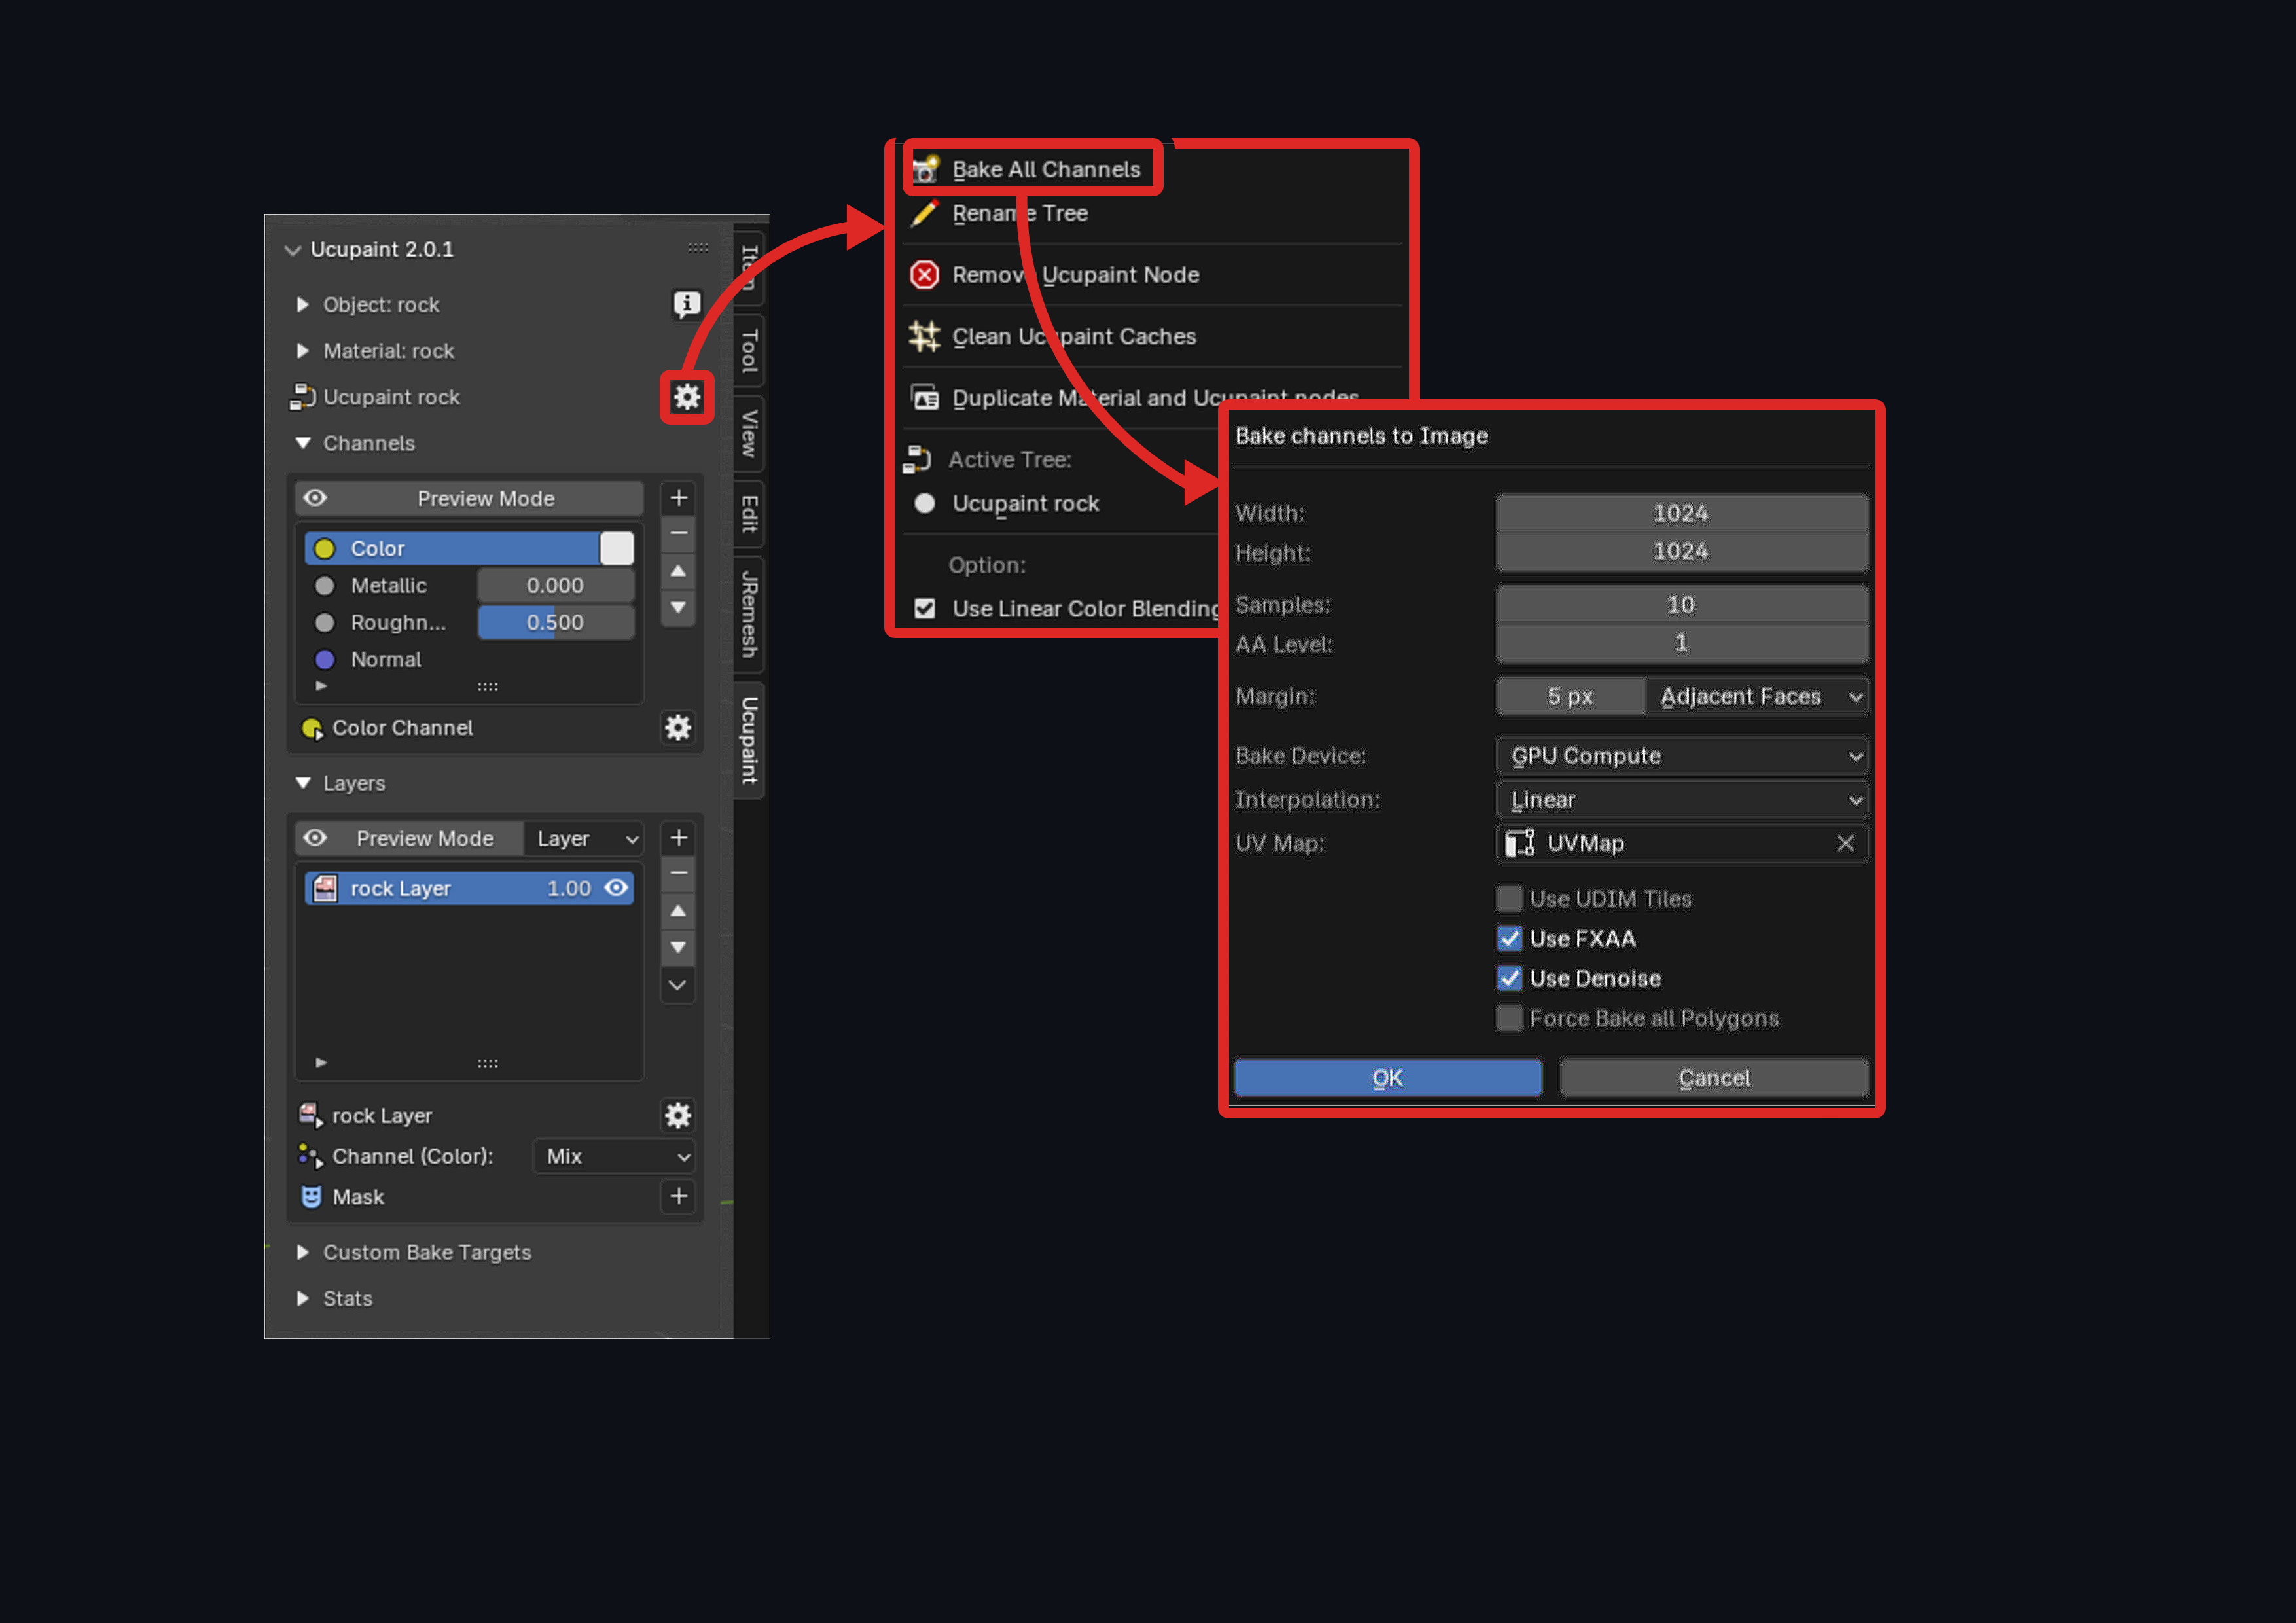
Baking
Ucupaint allows you to bake your individual layers, the full channel or the entire material to image textures. You can then choose to use the textures, or if you have to go back and edit something, you can go back to using your layers.
Upon saving your Blender file, all of the created image textures, your paint layers, masks, etc. will be automatically packed in the Blender file so you don’t lose them when closing the file.
Pros and Cons
Most of the annoyances I found with Texture Paint are not related to Ucupaint. I think what Ucupaint does, it does very well. And to me it’s not really a question of whether using Ucupaint makes texture painting easier, in my opinion it makes it feasible in Blender in the first place.
A major upside to using Ucupaint is that it allows you to work in a way that you’re probably familiar with if you’ve used Photoshop, Substance Painter or 3D Coat. You have most of the shader editor options available right in the UI, so you don’t have to spend time creating the nodes, mixing them and creating spaghetti. It takes care of all that pesky node setup for you, and you can focus on creating your beautiful materials. Being able to Texture Paint in Blender means you do not have to export to other programs, you can do it all in Blender, for better or for worse sometimes.
As I mentioned before, the main annoyances did not come from Ucupaint. They come from the fact that you’re still using Blender. And Blender is far from perfect, especially when it comes to Texture Paint. Texture Paint can be slow and laggy when using large brushes or the blur tool. When your brush overlaps other parts of the mesh that you’re not painting, it will still paint on them. This can be avoided by hiding certain parts of the mesh or using masking, but it is still inconvenient.
Other 3D texturing programs also have better baking and generators than Blender. The 3D Linear Gradient from Substance Painter is one in particular I missed a lot, also the nice curvature maps…
Summary
To fully appreciate Ucupaint, I think it’s important to understand what the purpose of Ucupaint is. Ucupaint is not trying to be a replacement for other 3D texturing programs, it is just trying to make it nicer to texture in Blender. And it definitely does.
It makes it easy to work in a non-destructive way or to quickly put down several materials. I myself enjoyed using Ucupaint in combination with Blenders Quick Edit functionality, to paint over screenshots in a painting program. If you have an empty layer selected while doing this, it will put your edits in that layer and you can continue to paint in Blender.
It’s probably not ideal but this allows you to overcome some of Texture Paints’ key limitations, for example not having a nice lasso selection tool.
I think using Ucupaint in Blender does make it a possible alternative to other 3D Texturing Packages, just keep in mind whether or not Blender has the features you need for your project.
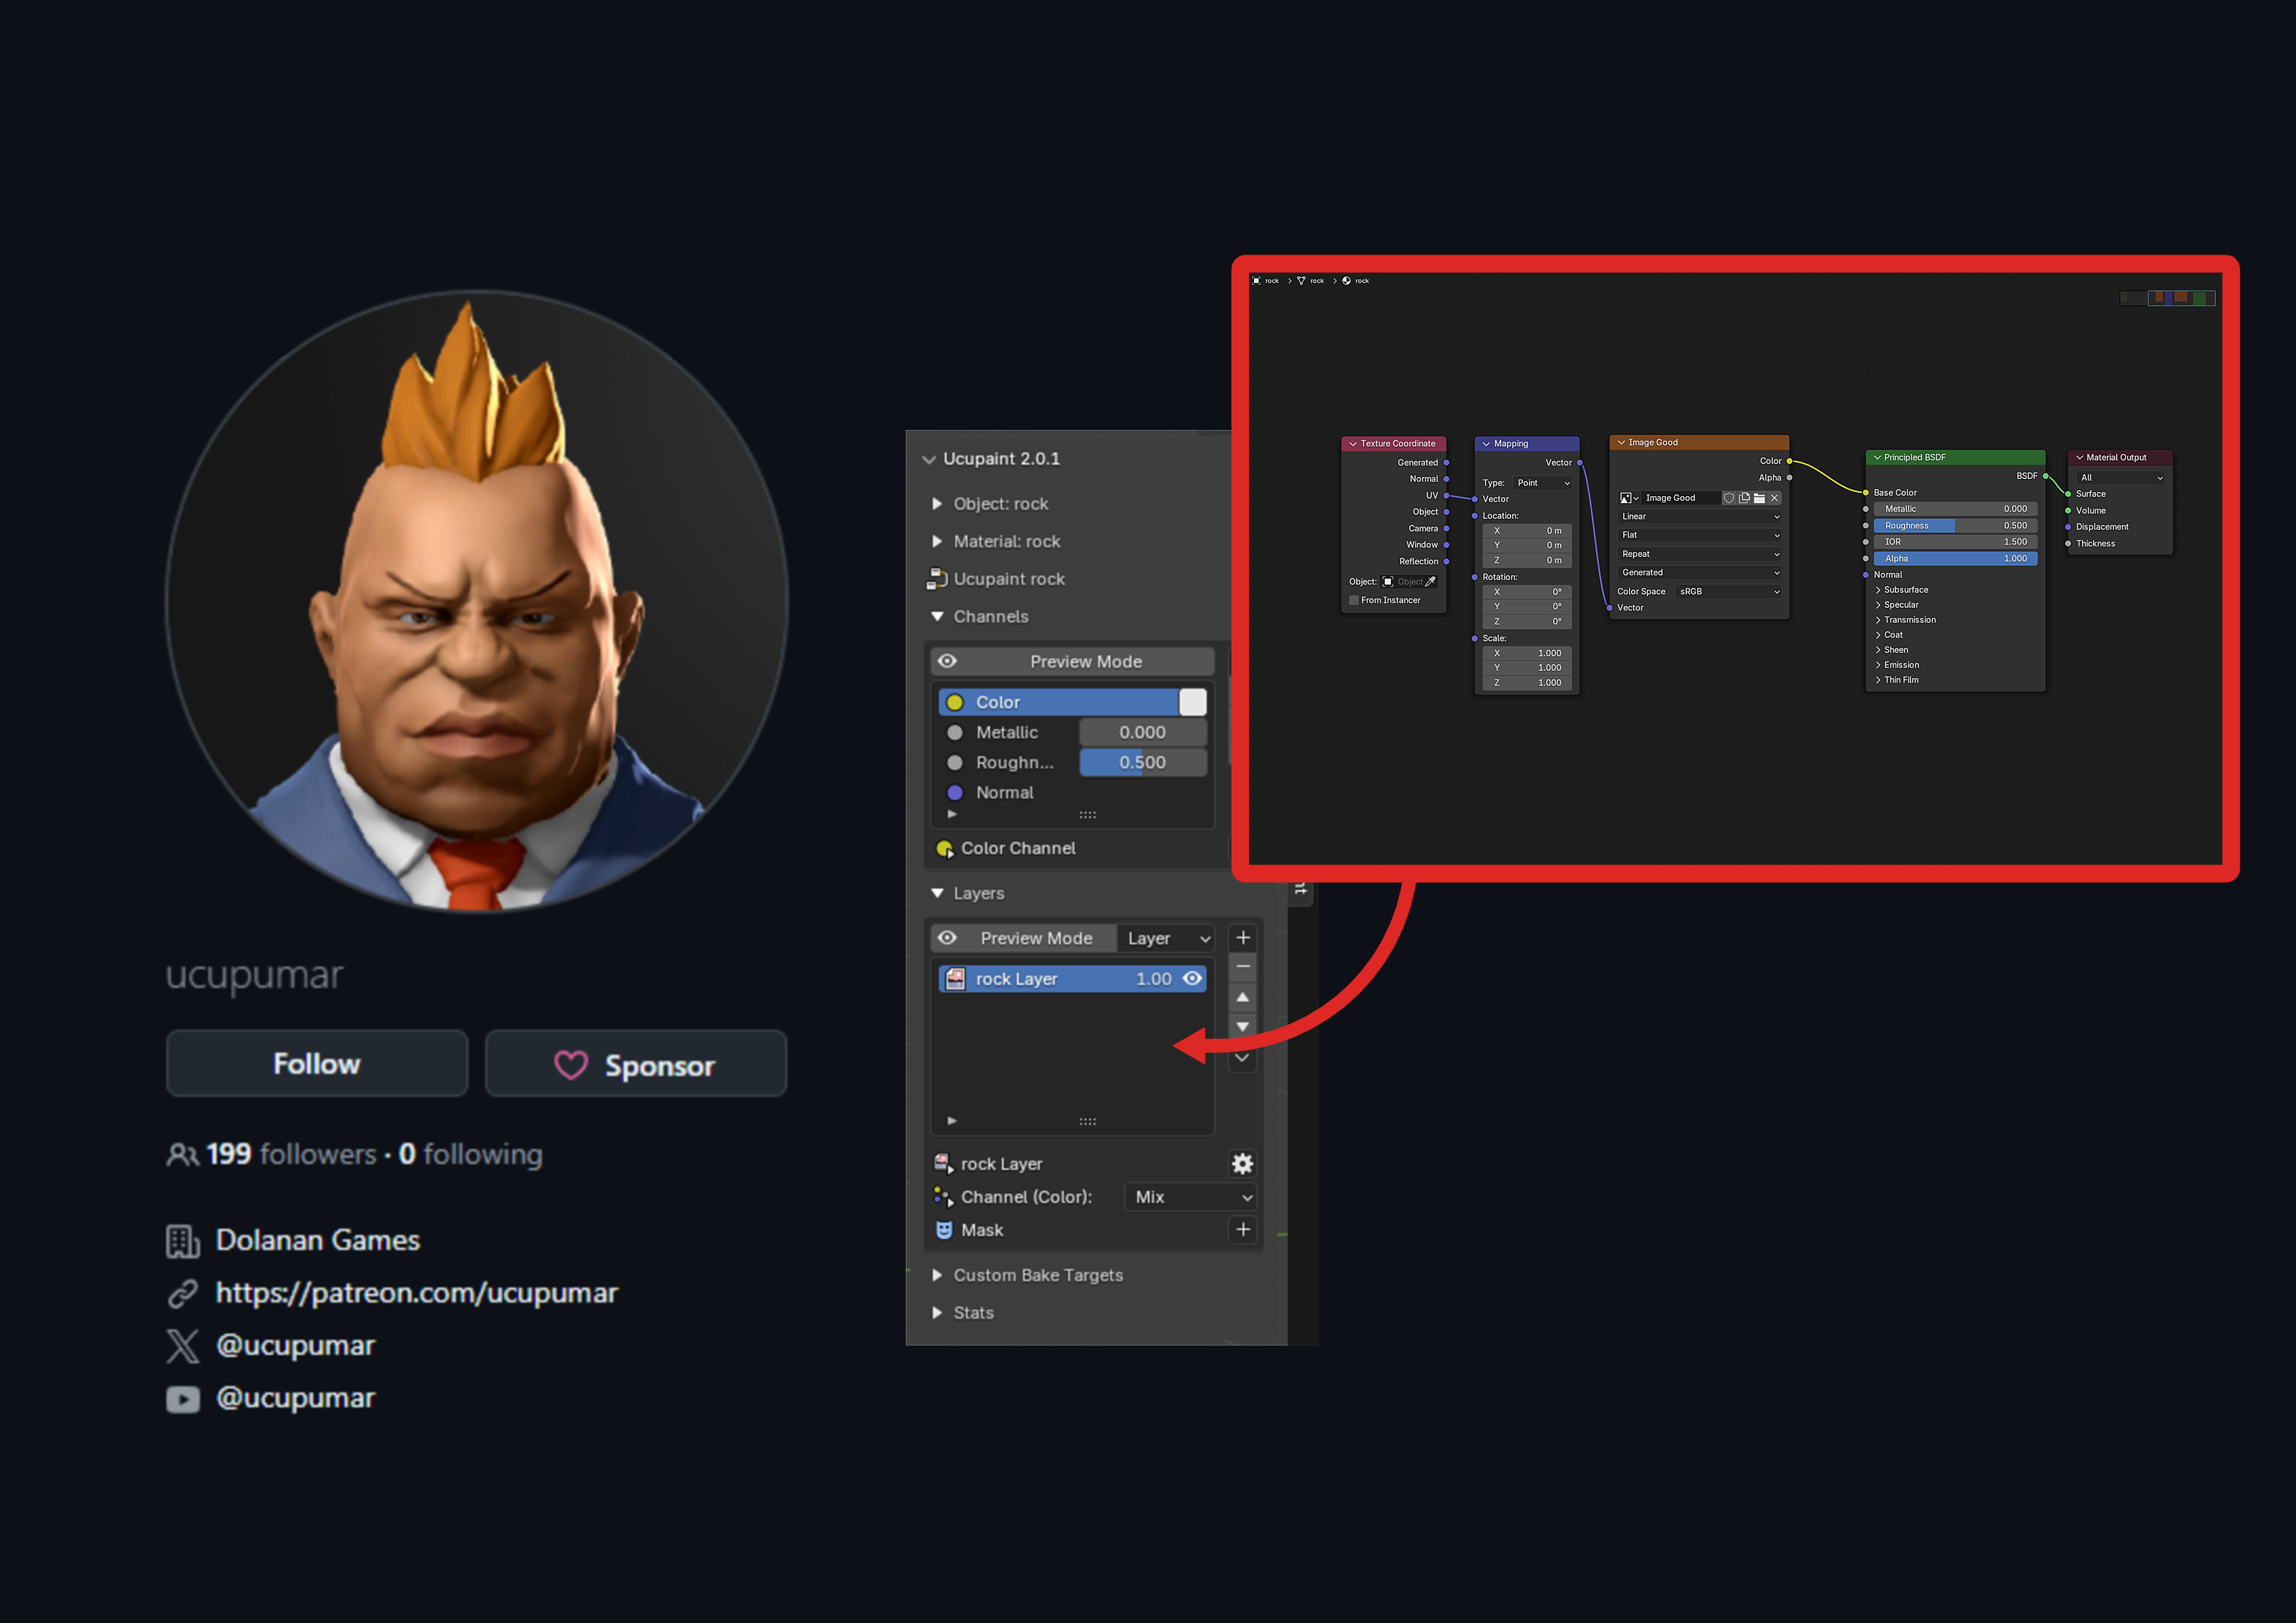
Creator: ucupumar - YouTube
Ucupaint Downloads: Ucupaint — Blender Extensions, Releases · ucupumar/ucupaint
Procedural Texturing using Ucu-Paint: How to Texture Paint Like a Pro in Blender: Easy Beginner's Guide with Ucupaint
Showing the basics: How to Stylize ANYTHING with Blender! Beginner Texture Painting Tutorial with Ucupaint
Showing Blender’s quick edit function: Blender’s Secret Weapon for Texture Painting - How to Use Quick Edit's Texture Projection
We use cookies to enhance your user experience. By continuing to visit this site you agree to our use of cookies.